Inhoudsopgave
Advertenties
Beschikbare talen
Beschikbare talen
Quick Links
NOTICE D'UTILISATION /
GEBRUIKSAANWIJZING/INSTRUCTION MANUAL
Lisez attentivement cette notice avant d'utiliser votre appareil. Suivez les
instructions et conservez la notice pour vous y référer ultérieurement.
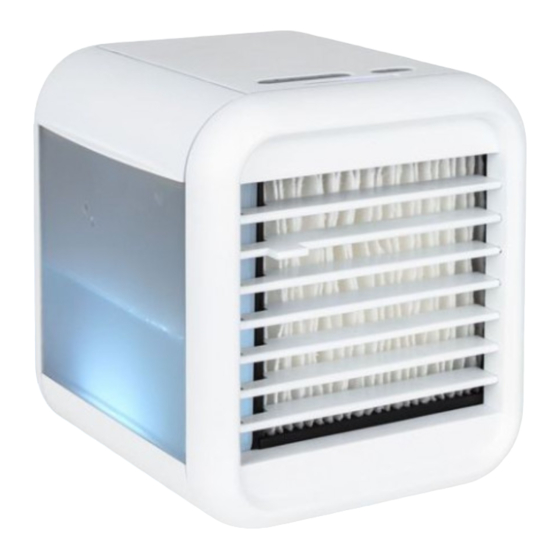
FR RAFRAICHISSEUR D'AIR
NL LUCHTKOELER
EN AIR COOLER
Modèle/Model : AC801
REF. 001948
Prise secteur : 100-240V . 50-60Hz
Alimentation USB : 5V DC 2A
Photo non contractuelle
Non-contractual photo
Foto is niet bindend
Produit importé par / Imported by / Ingevoerd door :
Euro-Tech Distribution
37A rue César Loridan 59910 Bondues – France
Advertenties
Inhoudsopgave

Gerelateerde Handleidingen voor Saneo AC801

Samenvatting van Inhoud voor Saneo AC801
- Pagina 1 Lisez attentivement cette notice avant d’utiliser votre appareil. Suivez les instructions et conservez la notice pour vous y référer ultérieurement. FR RAFRAICHISSEUR D’AIR NL LUCHTKOELER EN AIR COOLER Modèle/Model : AC801 REF. 001948 Prise secteur : 100-240V . 50-60Hz Alimentation USB : 5V DC 2A Photo non contractuelle...
-
Pagina 2: Consignes Importantes De Securite
CONSIGNES IMPORTANTES DE SECURITE Cet appareil peut être utilisé par des enfants âgés de 8 ans et plus et par des personnes ayant des capacités physiques, sensorielles ou mentales réduites ou dénuées d’expérience ou de connaissance, s'ils (si elles) sont correctement surveillé(e)s ou si des instructions relatives à... - Pagina 3 Placez cet appareil sur une surface horizontale et très stable. Ne déplacez pas votre rafraichisseur d’air lorsqu’il est rempli d’eau. Il se peut que de l’eau reste dans la base de l’appareil, même si le réservoir est vide. ...
- Pagina 4 Débranchez toujours le rafraichisseur d’air avant de le nettoyer et avant de le déplacer. L’appareil peut être complétement éteint uniquement lorsqu’il est débranché de la prise électrique. Ne penchez pas et ne retournez pas l’appareil, surtout lorsqu’il y a de l’eau à l’intérieur. ...
-
Pagina 5: Description Détaillée
Description détaillée Fonctionnement Branchez l’appareil, le voyant d’alimentation 1. Bouton de mise en marche : on /off 2. Bouton de réglage de la vitesse du ventilateur 3. Bouton de réglage pour la lumière Led 4. Grille avant 5. Couvercle du réservoir d’eau 6. - Pagina 6 2. Ouvrez le couvercle du réservoir et remplissez le avec de l’eau. Nous vous recommandons l’utilisation d’une pichet pour remplir le réservoir ou d’enlever le réservoir pour le remplir. 3. Branchez l’adaptateur secteur dans la prise électrique, puis insérez la plus large fiche USB du cable sur l’adaptateur et la plus étroite fiche dans le port d’alimentation au dos du rafraichisseur d’air.
-
Pagina 7: Nettoyage Et Entretien
Utilisation Appuyez sur le bouton Mise en marche. Réglez la vitesse de ventilation en appuyant sur le bouton Vous pouvez choisir la vitesse basse ( LOW°), moyenne ( MEDIUM) ou élévée ( HIGH). Le témoin lumineux a côté du bouton de réglage de la vitesse indique quelle vitesse est sélectionnée. - Pagina 8 Débranchez l’appareil de la prise Enlevez le reservoir d’eau Enlevez la partie avec le filtre. ERP INFORMATION Description Symbole Valeur Unité Débit d'air maximal 0.76 m3/min Puissance absorbée 8.13 Valeur de service 0.09 (m3/min)/W Consommation d'électricité en 0.15 mode « veille » Niveau de puissance acoustique dB(A) Vitesse maximale de l'air...
-
Pagina 9: Important Safety Instructions
COLLECTE SELECTIVE DES DECHETS ELECTRIQUES ET ELECTRONIQUES Les produits électriques ne doivent pas être mis au rebus avec les produits ménagers. Selon la Directive Européenne 2012/19/EU pour le rebus des matériels électriques et électroniques et de son exécution dans le droit national, les produits électriques usagés... - Pagina 10 network whose installation complies with safety standards. - Check that your device is in perfect condition before use. Do not use it if you notice any anomalies. No parts can be replaced by the user, contact your service department to avoid any danger. - This appliance is intended for domestic use and only inside your home.
- Pagina 11 - Do not touch the electrical outlet or power cable with wet hands. - For best results, place the cooler on a raised surface such as a table or work surface. - Do not use the air cooler near radiators or electrical appliances.
- Pagina 12 - Unplug the unit when filling and cleaning it. - Ensure that the fan is switched off from the supply mains before removing the guard. - If you are not going to use the air cooler for a long period of time, empty the water tank, turn on the unit and set the highest speed for at least 4 hours.
- Pagina 13 1. Power button: on /off 2. Fan speed control knob 3. Adjustment knob for LED light 4. Front grille 5. Water tank cover 6. Water tank Installation 1. Place the unit on a flat and stable surface. 2. Open the tank cover and fill it with water. We recommend that you use a pitcher to fill the tank or remove the tank to fill it.
- Pagina 14 3. Plug the AC adapter into the electrical outlet, then insert the larger USB plug of the cable into the adapter and the smaller plug into the power port on the back of the air cooler. NOTE: You can also put the widest part of the cable directly on the USB port of a computer or backup battery.
-
Pagina 15: Cleaning And Maintenance
Choose the colour of your light by pressing the button . You can choose between a fixed colour or a colour cycle. The 7 colours are: RED, BLUE, PURPLE, GREEN, YELLOW, TURQUOISE and WHITE. When you are finished, press the On/Off button to turn off the unit. Note: We recommend that the unit be operated at HIGH ventilation speed for at least 5 minutes before the unit is switched off to dry. - Pagina 16 Unplug the unit from the outlet Remove the water tank Remove the part with the filter WARRANTY This product is guaranteed for a fixed period of time with the distributor from the date of purchase against any failure resulting from a manufacturing or material defect.
- Pagina 17 BELANGRIJKE VEILIGHEIDSINSTRUCTIES Deze apparatuur mag worden gebruikt door kinderen van 8 jaar en ouder en door personen met verminderde fysieke, zintuiglijke of mentale vermogens of zonder ervaring of kennis, indien zij naar behoren worden begeleid of indien hun instructies voor een veilig gebruik van de apparatuur zijn gegeven en de betrokken risico's zijn opgepakt.
- Pagina 18 vervangen, neem contact op met uw serviceafdeling om elk gevaar te vermijden. - Dit apparaat is bedoeld voor huishoudelijk gebruik en alleen binnenshuis. - Plaats dit toestel op een horizontale en zeer stabiele ondergrond. - Verplaats uw luchtkoeler niet als deze gevuld is met water.
- Pagina 19 - Gebruik de luchtkoeler niet in de buurt van radiatoren of elektrische apparaten. - Gebruik de luchtkoeler niet in de buurt van open vuur of andere warmtebronnen. - Plaats het apparaat niet in een gang of op een plaats waar veel mensen doorheen gaan, omdat het kan worden geduwd en vallen.
-
Pagina 20: Gedetailleerde Beschrijving
toestel. Als het apparaat gedurende een lange periode nat blijft, wordt het beschadigd door de verschijning van schimmel. Gedetailleerde beschrijving USB- aansluiting... -
Pagina 21: Installatie
1. Aan/uit-knop: aan/uit 2. Regelknop ventilatorsnelheid 3. Instelknop voor LED-licht 4. Voorgrille 5. Watertankdeksel 6. Waterreservoir Installatie 1. Plaats het apparaat op een vlakke en stabiele ondergrond. 2. Open het deksel van de tank en vul deze met water. Wij raden u aan om de tank met een kruik te vullen of de tank te verwijderen om de tank te vullen. -
Pagina 22: Opmerking
3. Steek de AC-adapter in het stopcontact, steek dan de grotere USB- stekker van de kabel in de adapter en de kleinere stekker in de voedingspoort aan de achterkant van de luchtkoeler. OPMERKING: U kunt ook het breedste deel van de kabel direct op de USB-poort van een computer of back- upbatterij leggen. -
Pagina 23: Gebruik
Gebruik Druk op de aan/uit-knop. U kunt de ventilatiesnelheid aanpassen door op de knop te drukken U kunt de lage ( LOW°), gemiddelde ( MEDIUM) of hoge ( HIGH) snelheid kiezen. Het indicatielampje naast de snelheidsregelknop geeft aan welke snelheid is geselecteerd Kies de kleur van uw licht door op de knop te drukken . -
Pagina 24: Selectieve Ophaling Van Elektrische En Elektronische Apparaten
Wij raden u aan het waterreservoir en de binnenkant van het apparaat eenmaal per week te reinigen. Gebruik alleen niet-schurend doekje mild afwasmiddel indien nodig. Haal de stekker van het apparaat uit het stopcontact Verwijder het waterreservoir Verwijder het onderdeel met het filter GARANTIE Dit product beschikt over een garantie, die geldt bij een defect dat het gevolg is van een fabricagefout of het materiaal, met een duur die bepaald wordt door de verdeler vanaf de...